I am about to try to give my first tutorial! I had someone ask me the other day how I did my onesies so I figured the next time I did one I would take pictures to show the process.
This design is a seahorse with a name underneath and it is being done on a size 3 month Carter's brand onesie.
Lay out your onesie.
Turn your onesie inside out.
Fold your onesie in half long ways making sure to match all seams! If you don't, your applique can come out crooked or off center. You want the front of your onesie on the outside of your fold. Remember, it is INSIDE OUT!
Get your appropriate size hoop for the design you are using. I have 3 sizes. 4x4, 5x7, and 6x10. For a 0-3 month onesie, you don't want to get much bigger than 4x4. This one measures just a little longer because of the name so I am using my 5x7 hoop.
Hoop your stabalizer only. This is medium weight cutaway. Not sure as to the brand or anything. Have had this enormous roll for over a year.
Carefully pick up your onesie and lay it done the middle of the hoop CAREFULLY making sure not to undo those matched seams.
There are little notches at the middle points of the hoop to help you out.
CAREFULLY unfold your onesie being sure not to shift it.
A wider shot.
Now peek open the top and bottom of your onesie and pin just the front of your onesie to the stabalizer.
See my straight pins?
Now put it on your machine.
Now you have to make your opening to where you sew. Pull up the back of the onesie (it's loose remember, you only pinned the front down) so that way you don't sew it too. I have done this more than a few times.
See, the back of the onesie is bunched up around where I am going to sew. This is also why you NEVER EVER leave your machine while it's sewing. This can fall over and then you have a big ole mess when it gets sewn to the front.
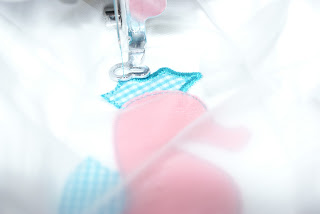
Now its time to start. Step 1 is the laydown stitch. This tells you where to put your fabric.
Remove the hoop from your machine and carefully cut out around the stitches. Close enough that they won't show through the satin stitch but not so close that you cut your stitches. It's a balancing act I know.
Put your onesie back on the machine and it's on to the next steps placement stitch. You also need to check and make sure your onesie is out of the way.
Put the fabric down, tack down stitch, cut it out, put it back on. Just to clarify, you aren't unhooping your onesie, just removing the entire hoop from the machine.
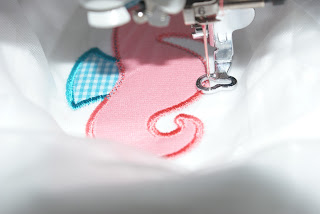
Now it's the seahorses body. You can change to the appropiate thread color but it's all hidden under the satin stitch so I don't. Check your onesie! Don't sew the back!
Cut the next fabric out a little bit bigger and it does the tack down stitch.
Tack down stitch.
Cut it out. These are 4" curved gingham scissors.
You are done with the applique steps! Put your hoop back on the machine.
See the thin plastic stuff I put over it? It's called Solvy. It just makes your stitches look so much better.
Check your onesie again! Don't sew it to itself! Here goes the satin stitches!
Where are my children do you ask? Why, they are watching Jake and the Neverland Pirates!
Back to sewing. Change your thread and do the next step. Yep, Check your onesie again and make sure you aren't about to sew it to itself. (redundant I know).
Next is the name. You have to pull the onesie to get it out of the way. See now my seahorse is covered but that's fine because we're done with it. Oh yeah, there was the eye step above too but that was no big deal.
The Solvy is down there too! There goes the name!
You have to keep checking the onesie so that it the space that's about to sewn is not covered. This is why you NEVER EVER walk away!
DONE!!!
Take the hoop out of the machine.
Pull off your solvy as best you can.
There's also solvy in all the steps and letters so you have to individually pull out those little pieces too. Don't freak out if some of it is too tiny, it's water soluble so you can just spray it down with warm water and it will dissolve.
Now take out your straight pins!
Now unhoop your onesie and cut around the stabalizer. Not too close though. Don't cut the stitches or your onesie.
See. Finished.
Now it's done! And there is the ruffled diaper cover that I sewed to match.
Hope all that made sense!
Annie
P.S. I want to say the Seahorse is by Plant Applique and the font is Curlz. I bought it from 8 claws and paw I believe!


Very useful! Thank you for sharing!!
ReplyDeleteI never knew that it depended on the number of stitches one got. I just assumed that it was so much per image that was placed on the garment. Guess you learn something new each day.
ReplyDeleteIn this post provide awesome information about Applique refers to using fabric shapes or designs and also describe all info about needlework technique in which pieces of fabric, embroidery, or other materials. So thanks for share this valuable information.
ReplyDeleteI know this is YEARS later but I have to tell you that your post was so much better than some that have been doing these post for a long time. I really like the way you explained it so easy. Thanks & great job! I'm sure your an ol' pro at it now! :)
ReplyDeleteI know this is YEARS later but I have to tell you that your post was so much better than some that have been doing these post for a long time. I really like the way you explained it so easy. Thanks & great job! I'm sure your an ol' pro at it now! :)
ReplyDelete